Showing posts with label Sewing. Show all posts

Thursday, March 1, 2012

Hey There!

One of our Lacrosse Stars
We have been really busy around here lately with new sports, family visiting and vacation planning. Oh and Sewing!! Here a sneak peak.....
Remember the Make This  Look post? Well I am almost done!! I have found another blogger out there who is making my same look. I have asked her assistance on the neckline. Hoping mine turns out as well as hers. Thanks Mary. I am doing OK on my goal of only buying patterns / fabric for one project at a time. I did however cheat and order a pattern to make this dress next! I am loving Jamie Christina patterns.
I saw this beauty displayed over on Hello Beautiful where she has made this dress at least twice! I am loving the Navy and Lime jersey knit.
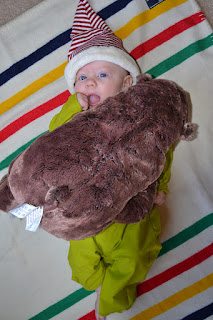
Moving On..... Dana has the best boys tutorials. This Friday is Dr. Seuss Day at school. LilMan needs some new shirts and I wanted to play with the 90 minute shirt tutorial. So I took 120 minutes and made a shirt from on old College Bar T-shirt. Appropriate right? I had already used Dana's tutorial to make him Dr Seuss pants.

I think he is going to look adorable tomorrow!! At least this time all the seams met up and there are no holes in the arm pits. I did make one mistake -- one of the sleeves in inside out. Ughh. 
Pin It!

Wednesday, February 1, 2012

Baby Legs Tutorial

Source: Chickpea
Hello all!! I am a HUGE fan of Pinterest. My friends are all now friends of Pinterest thanks to Facebook. I now get emails all day long from my friends telling me the  next great  thing  I need to make for "our" babies. I have asked them all to make "Pins for Kelley to make". Here we go -- Pin # 1 complete. Will be showing them off tomorrow night with the girls. My stinkyface (that is his new bloggy nickname) (heck that is what I call him anyhoo) will be rocking these bad boys himself.

For the Tutorial, you can find plenty of them online. OR you can buy them brand new from Babylegs for $12 each. I on the other hand can make my own for MUCH less and I don't mind doing it. I did watch the video here first before attempting mine.

First you need a pair of knee high socks. Not to name drop here but Target has a great selection.


 Now you will cut to make 4 pieces. Cut at the toe and right below the heel. Then cut right above the heel on both pairs of socks to get your 4 pieces. You will not need the  Toes or the  Heel.
 Now the smaller (foot) part fold inside out then over again so all the "right" sides are showing and lined up evenly.
 Then put the "right" sides together again and match up and pin.

 Making sure  to catch all "3" layers here -- you will use a zig zag stitch to sew. 3 = the foot folded in half and the main part of the  sock.
 Here is your zig zag setting.
Viola... babylegs. I can't wait for stinky face to wear them for all the ladies tomorrow night!
Pin It!

Friday, January 13, 2012

Challenge Accepted ReSEWlution

OK.... Me Sew Crazy has this bloggy thing called ReSEWlution...My Goal for 2012.. yes I said it Goal is to start a project and finish it. So here it is.... Fabric ordered ~ check Pattern ordered ~ check just waiting to complete this.
Original Inspiration
Resources
Pin It!

Saturday, December 24, 2011

Merry Christmas!!

The Twelve Days of Christmas WOD was AWESOME!!
1 100M Run
2 K2E
3 Ab Mats
4 Burpees
5 Ring Pull Ups
6 Squats
7 Hollows
8 Rope Climbs
9 Karaoke 100M Run
10 Broad Jumps
11 Push Ups
12 High Knees
Just how the song is sung..... Ouch!

Now off to eat what I want!

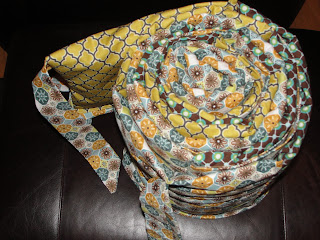
Here is a sneak peak of my Christmas Sewing thanks to Me Sew Crazy ... Now mind you this is my 1st baby outfit EVER made from scratch with no pattern.


And Lastly a bear hug.

Hoping everyone has a very Merry Christmas!
Pin It!

Wednesday, August 31, 2011

BoomBoomShaw can come anytime now

Well it is done. So we can have the baby anytime now. Babies room is a little messy but can be cleaned up very quickly and by Mr.M too.


I love the way everything turned out. Window treatments are done and ready to  be hung. I couldn' get the drill to install correctly so I am waiting for Mr.M.

Pin It!

Monday, August 29, 2011

Baby Onesies .... TO DO LIST

Thanks to Sweet Verbena for this inspiration. Now I am going to try on onesies for the babies!!! And how about those Clemson and Carolina Fans - aka my lil girls alike? Football starts this week does it not?


Happy Crafting...... and nesting


Pin It!

Thursday, August 11, 2011

More Mini Blankys.....


I had an idea -- since we live at the BEACH!!! My girlfriend is having a boy. And this looks cute -right? Found these fabrics off of Me Sew Crazy and they are adorable!!

Here is a closer look at each fabric:


Fabrics:
Emily Herrick Going Coastal Bottle Caps Multi
Emily Herrick Going Coastal Crab Walk Orange
Emily Herrick Going Coastal Sand Dollar Blue
Emily Herrick Going Coastal Sea Kelp Navy
Emily Herrick Going Coastal Sea Star Green
Patty Young Grand Bazaar Persian Wall Breeze

I did not make it past page 1 of their fabrics before I was swooning. $5.25/ half yard is not too bad a price. Have a fantastic Thursday.

Don't forget  the Charleston Blogger Meet Up tonight at Social see you upstairs in the Loft area.


Pin It!

Tuesday, August 9, 2011

Embellish a t-shirt with Ribbon - Go Blue


 Our Inspiration: Marc Jacobs added contrasting pleated ribbon details to his Resort 2010 collection.

Football Season is right around the corner. What girl does not want something stylish and in school colors to wear to support her team or her Man's Team? Thanks to this little Tutorial for the inspiration and direction!!
Add a little style to your next garment or project with folded ribbon. Unlike regular grosgrain ribbon, Petersham can be shaped to a neckline with a little steam from your iron, and it holds pleats well after pressing. Secure it with a few hand stitches. Inspired by Marc Jacob’s Resort 2010 collection, this technique is easy to complete in less than an hour and works well along necklines, skirt hemlines, on headbands, and even on handbags.
What You'll Need:Garment or accessory to embellish
Glass-head or solid-metal pins
Hand needle
Iron
Petersham ribbon, 1 1⁄2-inch-wide and 1⁄4-inch-wide, 1 yard of each
Press cloth
Thread

1. Fold the ribbon. Cut a length of 1 1⁄2-inch wide petersham ribbon at least three times as long as your garment neckline. Fold the ribbon back on itself, making pleats and folds to create your design. Secure the ribbon with solid-metal or glass-head pins. Continue across the neckline as desired.
2. Add more ribbon. Fold a length of 1⁄4-inch-wide ribbon, and layer it over the first as desired. Pin it in place.

3. Press the folds. Place a press cloth over the ribbon detail. Use a hot iron with steam to press all of the ribbon folds flat.
4. Sew in place. Hand-sew the ribbon to the garment (through all layers) at the crease corners on the larger ribbon and at each turn in the smaller ribbon
Pin It!

Tuesday, August 2, 2011

WINNER


Winner Winner Chicken Dinner

I was over on Handmade Baby Clothes and entered to win this Fabric!! And guess what … I WON!! I never win anything. I am so excited.  I cannot decide what to make the pants or the hospital shirt? Maybe Both???
Knit Pants
Sleep sack
Hospital shirt
Cannot wait to receive so I can start planning and Sewing. Did I mention it yet but
7 More Weeks!!


Pin It!

Saturday, July 30, 2011

BoomBoomShaw Nursery Treat

Mobile for BoomBoomShaw

This is what it will look like while BoomBoomShaw is on the changing table. (I had to lay down on the floor to get this shot.) Thank you Jessica for the inspiration. I love it.

I have attached the crib skirt – sorry no pictures yet. Here is the comforter. I think it turned out really well for my first ever blanket.


Onto Trader Joe’s and get a crib mattress today. Super Busy with nursery stuff!!


Pin It!
Related Posts Plugin for WordPress, Blogger...